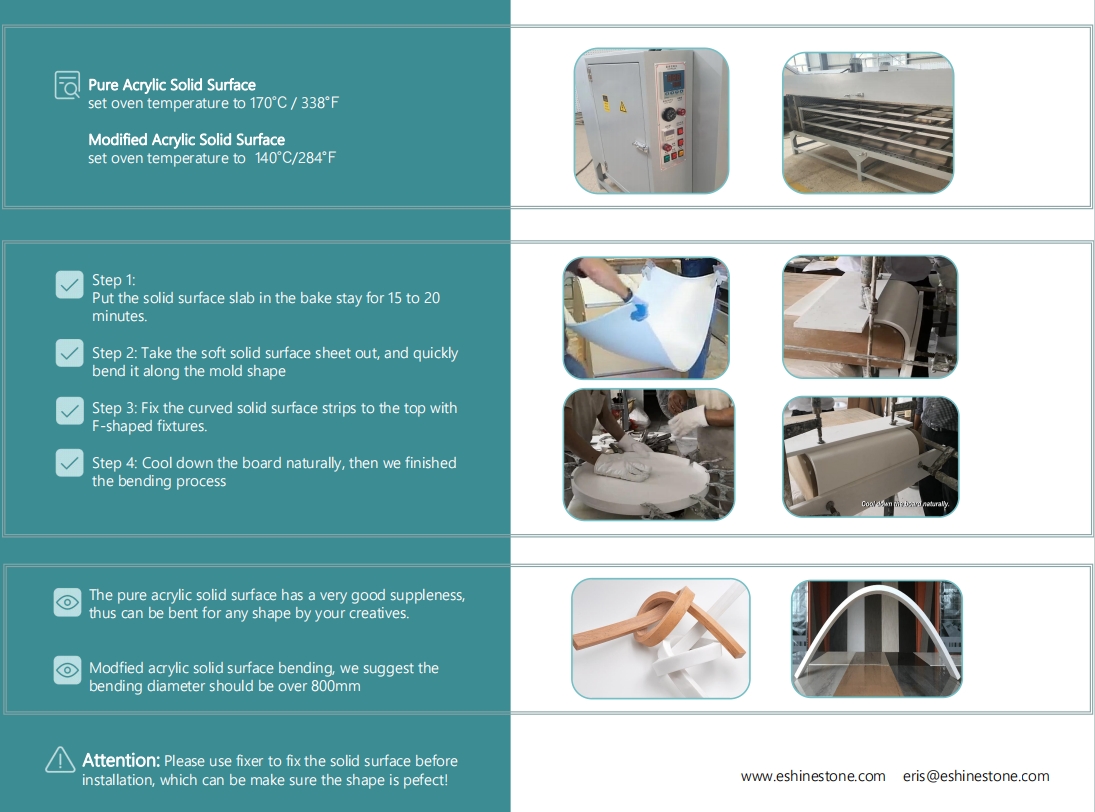
Creating beautiful, custom shapes with solid surface materials is no magic trick, but it does involve a fascinating process called thermoforming (bending). Let’s dive into the five key steps that make it all happen:
- Preparation – The Blueprint Stage
Before we dive into the thermoforming journey, it’s essential to finalize your design, shape, and decide the right temperature for your chosen material. Think of it as creating the blueprint for your masterpiece.

- The Thermoforming Process – Heat and Mold
Now, we move to the exciting part – heating and shaping. Your chosen acrylic solid surface is gently warmed to the perfect temperature. Once it’s all toasty and ready, it’s carefully taken out of the thermoforming oven. Then, it’s placed onto a custom-made mold, giving it its final, stunning shape. Imagine it like molding clay, but with some extra pizzazz!

- Cool Down – Chill, Don’t Rush
Your masterpiece is starting to take shape, but it needs to cool down. This step isn’t one to rush. Hurrying it could lead to unwanted cracks or imperfections. It’s like letting a freshly baked pie cool on the windowsill, giving it time to set just right.

- Finishing Touches – Polishing Perfection
Once your solid surface has cooled, it’s time for some fine-tuning. We’re talking sanding and polishing the surface and edges to perfection. It’s like adding the final brushstrokes to a work of art, ensuring it’s smooth and flawless.
- Installation – Bringing It Home
Your masterpiece is ready to shine! You can bring after-thermoforming-solid surface art to your site and install it professionally and securely. It’s like putting the cherry on top of the cake to make sure your surface can be enjoyed for decades.

In Eshine Stone company, Our Quality Promise – Satisfaction Guaranteed.
We’re all about quality and top-notch customer service. Please contact us to get the best of products.


